My husband and I always meal plan for a week in advance. Planning and shopping all at once saves us time, saves us from buying excess meat and produce that might end up going to waste, and helps us eat more healthy, homemade meals. Recently, we’ve even taken on planning and shopping for two weeks at a time.
I’ve been trying to come up with a cute way to display what’s we’re eating each week in our kitchen. I decided a DIY framed chalkboard would be best because I could pick a frame that matched the rest of the style in our house. I’m not a huge DIY kinda person, but how hard could it be to paint a frame with chalkboard paint?
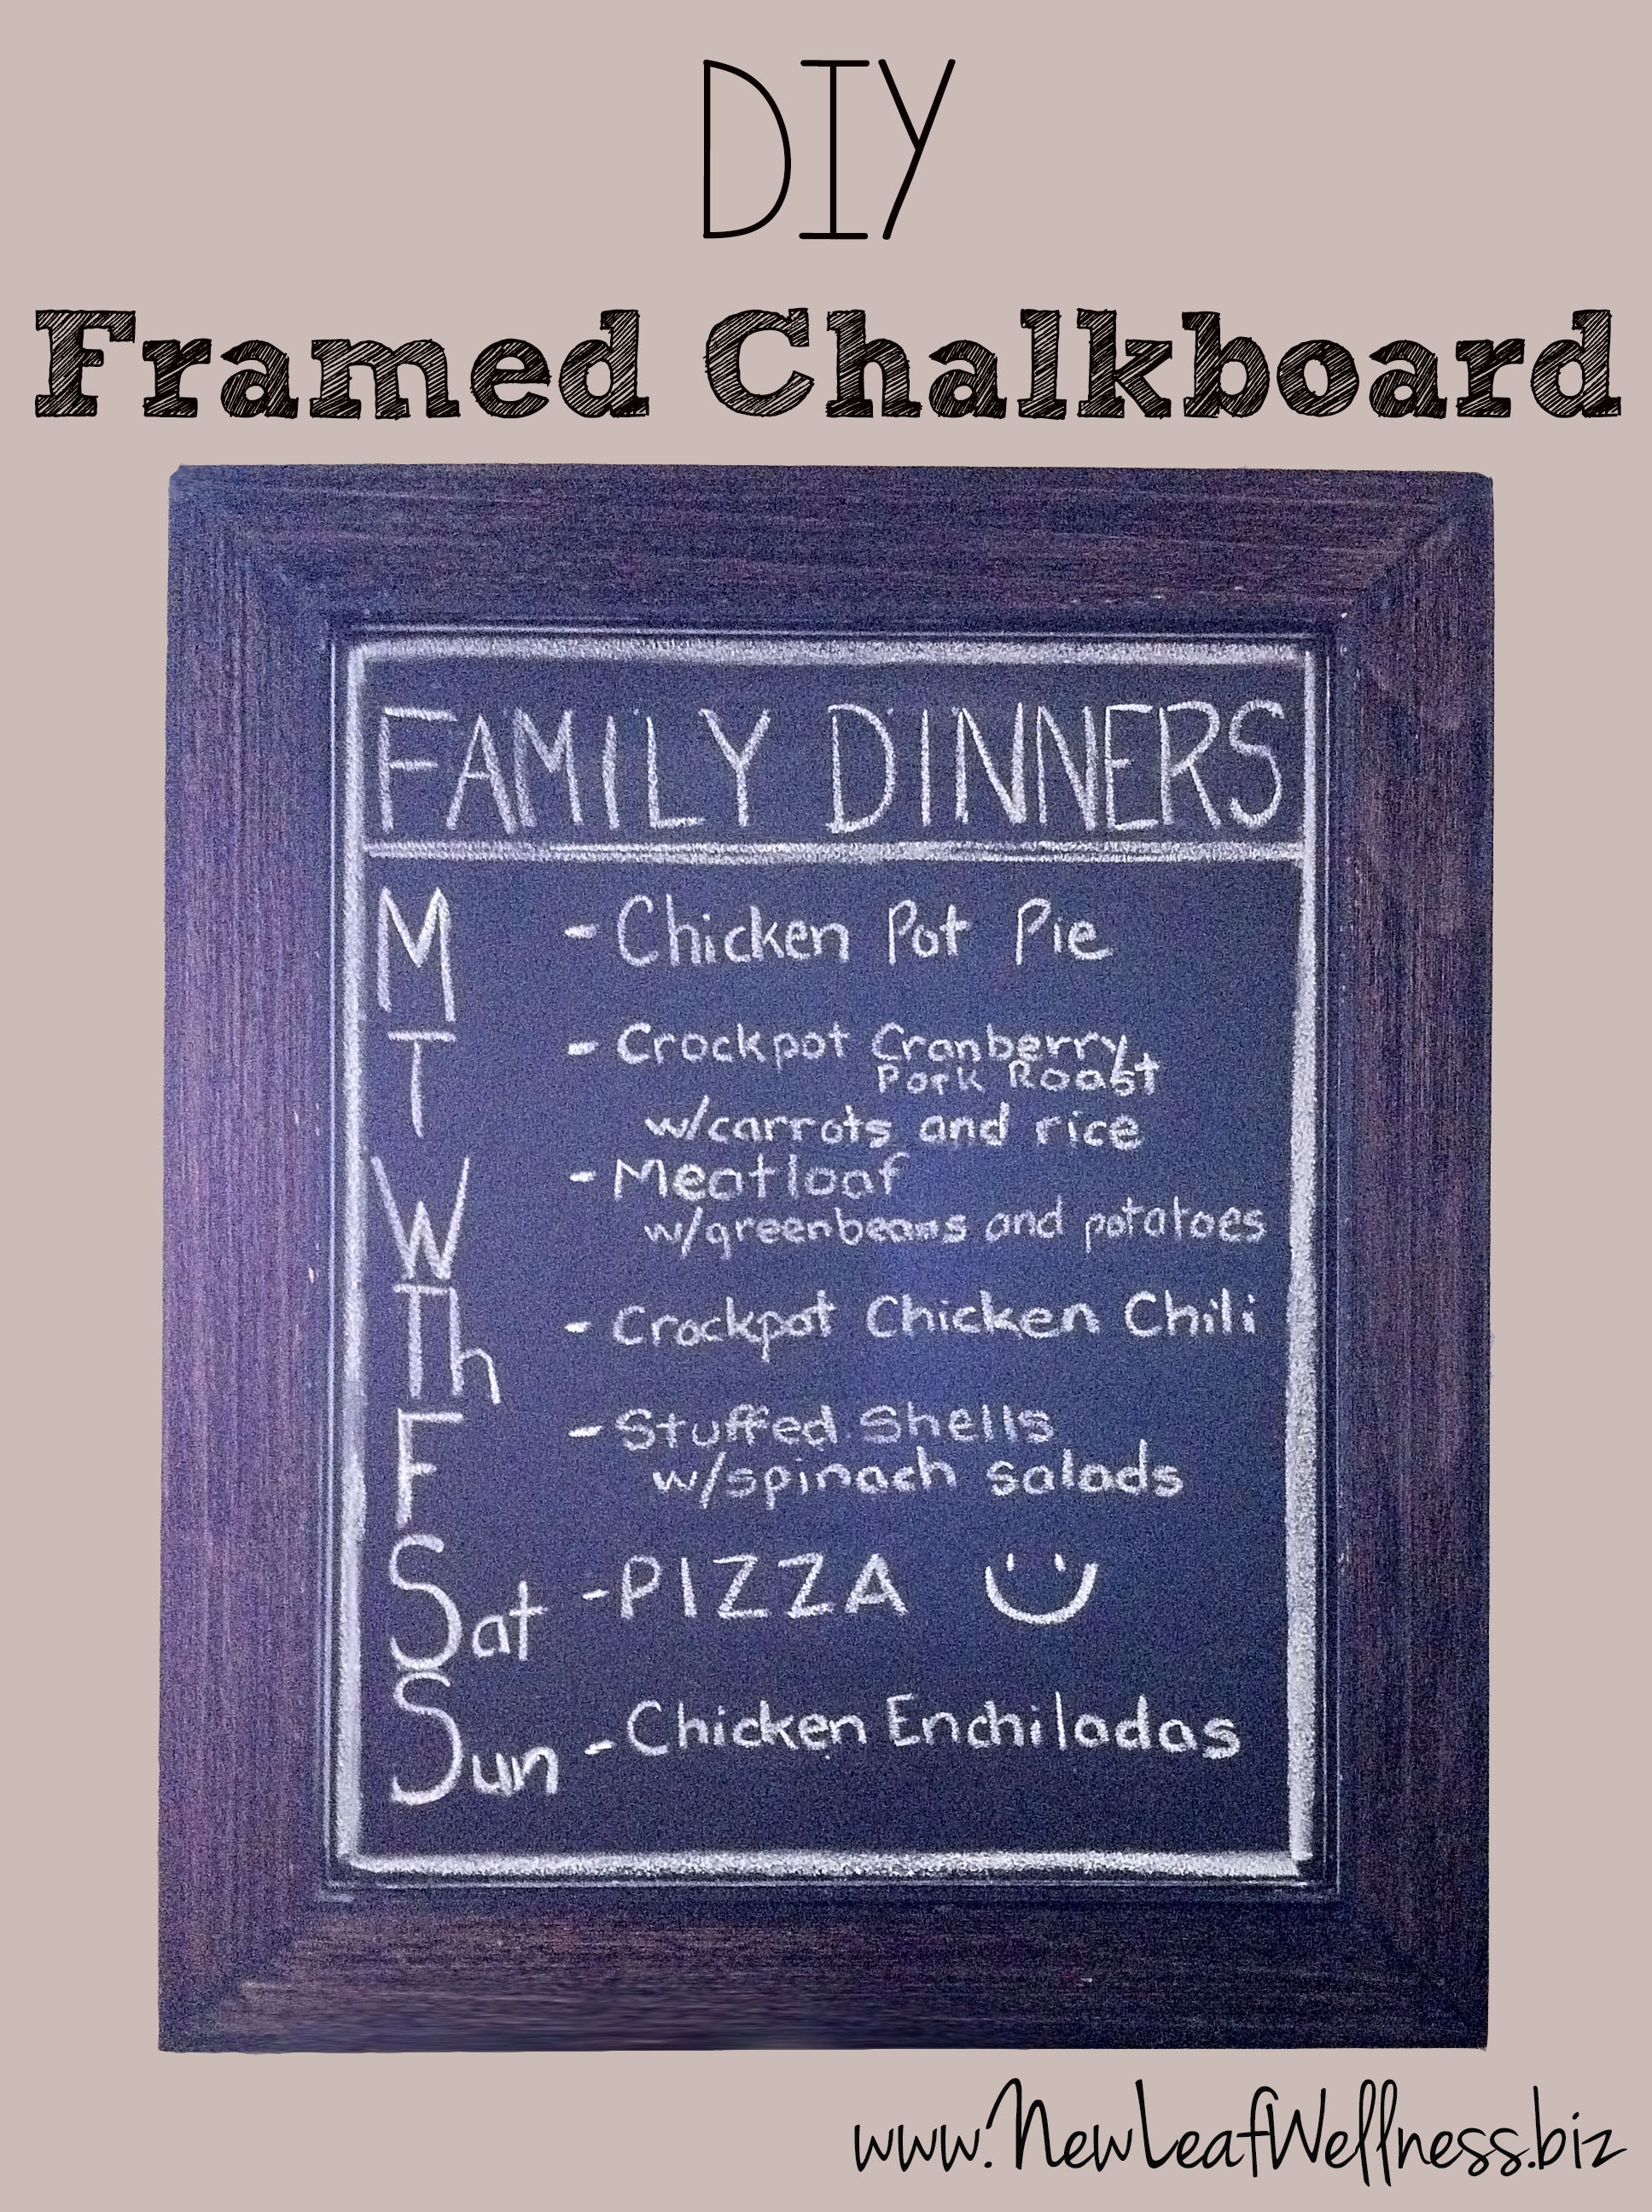
This DIY framed chalkboard started with a typical glass frame, and then my husband painted it with chalkboard paint. It was really easy, and only took a couple of hours from start to finish. Most of the time was spent allowing each coat of paint to dry. When it was totally done, we hung it in our kitchen so our whole family could see our weekly dinner menu.
My daughters are too young to read, but I can imagine using this dinner menu for many years to come.
Materials
- Glass picture frame
- Plexiglass, cut to size of glass (optional; we ended up using plexiglass instead of glass because our glass broke – oops!)
- Sand paper
- Glass cleaner and a cloth
- One can of spray paint primer
- Small can of chalkboard paint (ours was 946ml and we only used a small portion of it).
- Small foam roller
- Chalk (so you’re ready to use your chalkboard frame when it’s finished!)
Directions
- Remove the glass from your picture frame.
- Use the sandpaper to gently sand the glass/plexiglass (this will help the paint stick).
- Remove any particles from your glass/plexiglass with glass cleaner and a cloth.
- Spray the glass/plexiglass with your spray paint primer. Let dry.
- Use the foam roller apply a coat of chalkboard paint to your glass/plexiglass. Let dry (it will take about 30 minutes to dry)
- Apply a second coat of chalkboard paint, and let dry.
- Put the glass/plexiglass back into your frame.
- Hang, and add your menu with chalk!
Easy, right?!?
If you’re interested in any of the recipes that we’re eating this week, I’ve shared some of them on my blog before:
- Chicken Pot Pie
- Cranberry Pork Roast
- The Chicken Chili and Chicken Enchiladas are from my cookbook, ’15-Minute Freezer Recipes.’
Who does the DIY projects in your house?
—————————————–
Be sure to follow me on Pinterest for more cute DIY ideas, recipes, and meal planning tips!